

If you’ve ever searched for a harness bar for a Suzuki Swift, or you’re curious whether a BLOX Racing harness barcan fit a 2008 Swift, this guide will walk you through the entire unboxing and test-fitting experience. Whether you’re upgrading for track days, better harness mounting, or simply aesthetics, this article covers what to expect, what fits, and what doesn’t.
Why I Chose a Harness Bar for My Suzuki Swift
Before unboxing the BLOX Racing system, it’s worth explaining why I decided to go the harness bar route in the first place.
Im planning to run a 4-point harness in my Suzuki Swift so I need to be able to mount that safely. My original plan was to install a roll bar by Wiechers, a well-known German-made half cage designed specifically for the 3-door Suzuki Swift. It’s one of the few bolt-in options tailored for the European 3-door model, making it the ideal solution for safely mounting a 4-point harness.
But when I finally decided to order… I discovered Wiechers had gone bankrupt. Can you believe it? With the company gone, so was the only affordable European-made roll bar option for the 3-door Swift.
Japanese cages were the next logical choice, but:
- They’re extremely expensive to import
- Shipping costs are often higher than the cage itself
- And Japanese manufacturers only designed cages for their 5-door Swift, meaning fitment for the European 3-door model is not guaranteed
Because of this, I needed a safe, realistic alternative to properly mount my 4-point harness. A harness bar became the perfect compromise—relatively affordable, accessible, and easy to test-fit without committing to a full cage import gamble. However, since there is not a single company that’s making a harness bar specifically for the 2005 – 2010 Suzuki Swift, I had to try a universal one.
Unboxing the BLOX Racing Harness Bar
The BLOX Racing harness bar is a popular choice in the tuner scene—especially among Honda Civic enthusiasts. It’s affordable, widely reviewed, and easy to source. The model I chose is the 47-inch version, which is the shortest harness bar BLOX offers. And also seems to be the shortest version any harness bar producer makes.
Before going into fitment, it helps to understand that there are two common types of harness bars:
1. U-Shaped, Long-Type Harness Bars
These wrap around the rear of the cabin and sit further back. They usually allow more rearward seat movement, making them more practical for daily driving.
2. Straight, Short-Type Harness Bars

These mount directly between the B-pillars and sit closer to the front seats. They compromise slightly on seat travel, but many prefer their rigid and simple design.
The BLOX Racing bar featured here is this shorter straight design—the 47″ model.
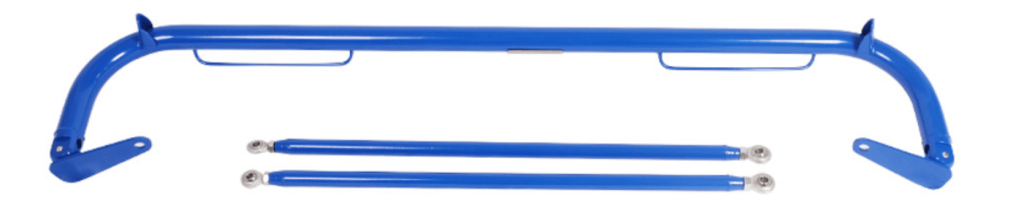
Inside the box you’ll find:
- The main horizontal bar
- Two vertical support bars
- Mounting brackets
- Hardware kit
The bar itself looks solid, though the supplied hardware isn’t the most aesthetically pleasing. Later in this post I’ll cover how to improve that.
Test Fitting the Harness Bar in a 2008 Suzuki Swift
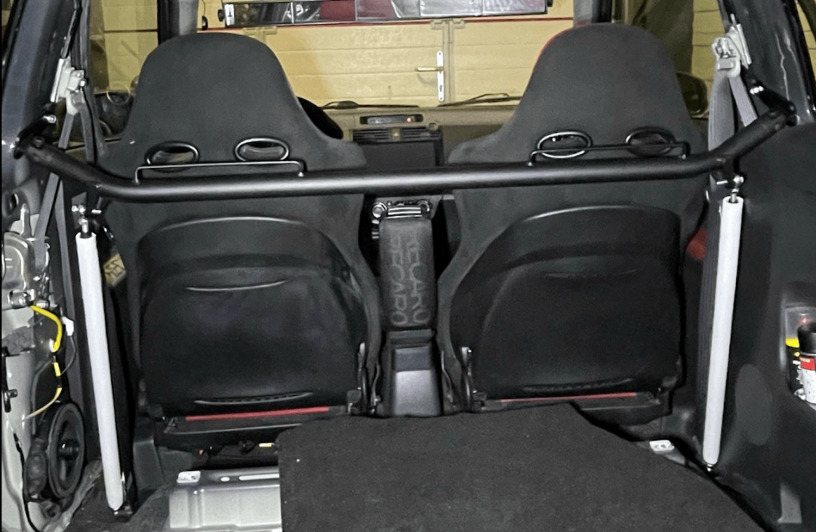
Unboxing is the easy part—now for the interesting bit. When attempting to test-fit the harness bar, I quickly found that this BLOX Racing harness bar does not fit on the top seatbelt mounting points.
On this generation of Suzuki Swift, the upper seatbelt bolts are too close together and sit at an angle that prevents the BLOX brackets from mounting flush. No amount of adjustment made this position viable.
The Fix: Use the lower seatbelt bracket bolts
Below the upper seatbelt mount that you use to slide the seatbelt up and down is another bolt that secures the bracket holding the top seatbelt mechanism. These lower bolts sit closer to the B-pillars, giving the bar just enough extra clearance to fit properly.
Using these lower mounting points:
- The BLOX 47” bar fits securely
- The position is ideal for proper harness routing
- You can keep the OEM seatbelts in place and keep them height-adjustable
- Because it’s an OEM seatbelt mounting point, it’s as rigid as the sliding mounting point usually used.
- Seat movement remains manageable
- The overall alignment is significantly better
Improving the Hardware & Final Fit
While the bar fits nicely using the lower bolts, the included hardware leaves room for improvement.
My recommendations for a cleaner, more solid install:
✔ Add proper spacers
The OEM lower seatbelt bolt is size M11 and has a step at the beginning instead of thread. This step allows the bottom of the OEM 3-point seatbelt mount to move freely, needed when sliding your seat back and forth which allows to adjust the angle and prevents the seatbelt from getting tangled. If you use the replacement bolt without step you will lose this adjustability, unless you add a spacer that mimics the behaviour of the stepped OEM bolt. Although BLOX delivers spacers with the harness bar, they are very wide and don’t allow keeping OEM seatbelt bolt with the stepped part. I will buy shorter spacers to space out the vertical bar from the chassis and to space out the vertical bar from the OEM seatbelt mounting point.
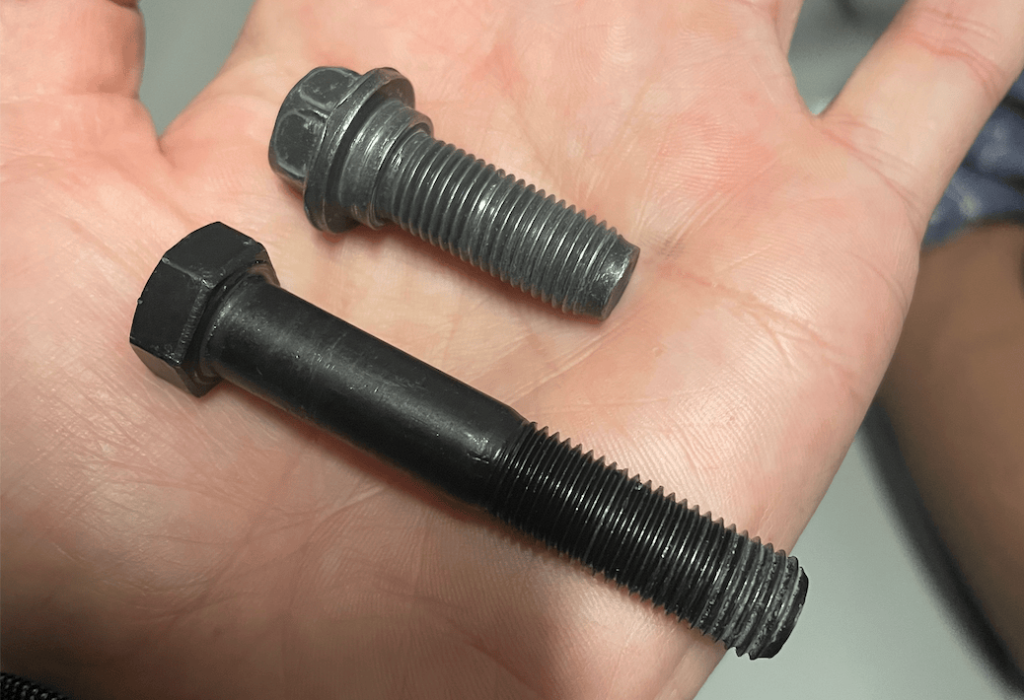
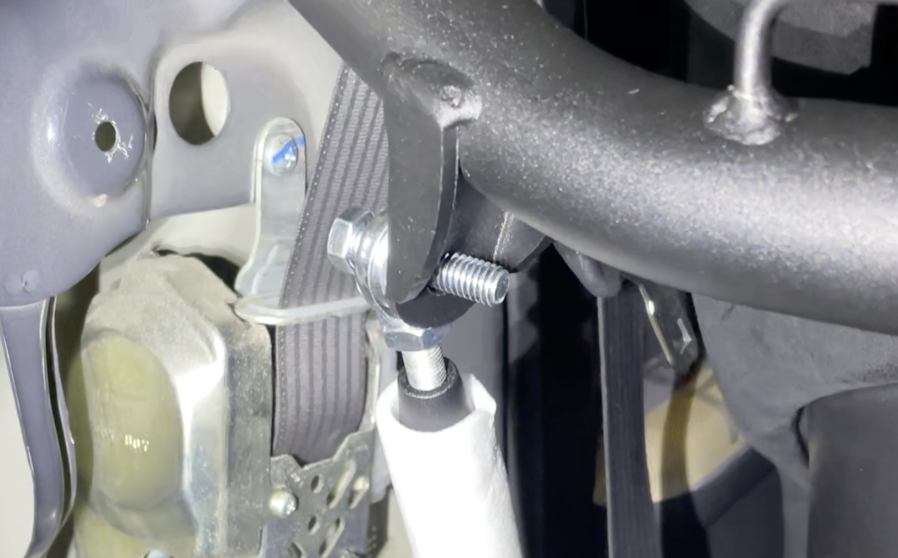
✔ Use shorter bolts
The supplied bolts for connecting the horizontal bar with the two vertical support bars (see photo below) are longer than necessary and not very pleasing to look at. Replacing them with shorter bolts will improve appearance and better fitment with the nylon nut. The long, black bolt intended for the lower mounting point of the vertical bar is longer than needed, so I will try to use the OEM bolt or a shorter aftermarket one.
✔ Upgrade the visible mounting hardware
Switching to stainless, zinc-coated, or black-finished bolts makes the installation look cleaner and more professional.
With these small upgrades, the harness bar will be rock-solid once tightened and significantly more robust and visually refined.
Final Thoughts
The BLOX Racing 47-inch harness bar can indeed fit a 2008 Suzuki Swift, but only when mounted to the lower seatbelt bracket bolts. Once installed with some upgraded hardware, it becomes a sturdy and effective solution for anyone wanting to run a 4-point harness.
At the bottom of this article, you’ll find a video showing the full unboxing and test fit so you can see exactly see how everything comes together. If you’re considering a harness bar for your Suzuki Swift—or specifically a BLOX Racing unit—this video will make the process crystal clear.
Scroll down to watch the video or go our YouTube Channel for more videos!


Leave a Reply